Coralvue Super Reef Octopus 2000 Internal Skimmer Review
July 5, 2010
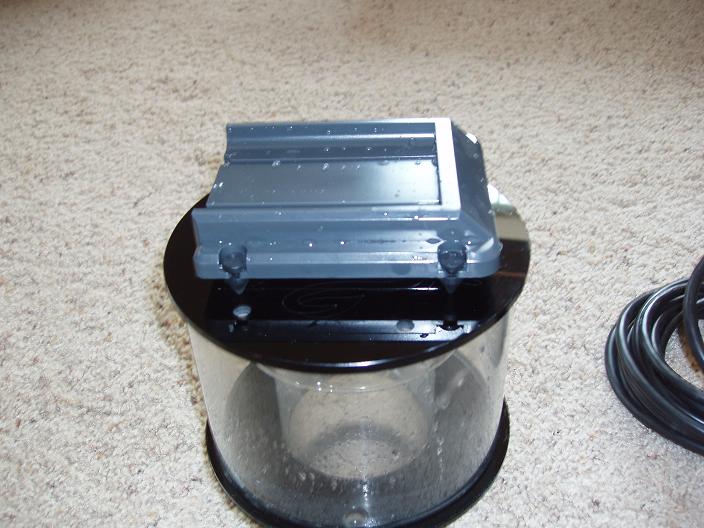
The SRO-2000 INT, rinsed and ready for setup.

|
A few weeks ago I decided to upgrade my 2005 model of the Coralvue Reef Octopus Needlewheel 150 Skimmer to the newer Coralvue Super
Reef Octopus 2000 Internal Skimmer. My NW150 had served me well on my older 75-gallon system, but was relatively underpowered on my
current 155-gallon system. It had only held up for so long, I feel, because of my relatively large display refugium.
The biggest barrier that had prevented me from upgrading sooner was the high price tag on the Super Reef Octopus line. The SRO2000
came out with an original price tag of $350 and even after a few months of patience I was only able to grab mine for $325. Back when
I purchased my NW150, it had been retailing for $160.
I was originally aiming for the SRO2000-XP model - a full cone skimmer with a large number of positive reviews. However, after some
measurements of my sump, I realized that I was limited to a 6" diameter body. The maximum diameter of the SRO2000-XP is 8". Actually,
the 6" diameter SRO2000 is the highest model of the Super Reef Octopus line that could fit in my sump.
The NW150 on the left, and the SRO2000 on the right.
The SRO2000 is actually a little smaller, despite it's better performance.

|
The SRO2000 has a number of considerable improvements over the NW150. These include:
-
The very highly regarded Honya Bubble Blaster 2000 pump with pinwheel impeller in place of the NW150's Octopus OTP-2000 pump
with needlewheel impeller.
-
A much thicker silicone tube connecting the pump to the air-intake, allowing for more air-flow.
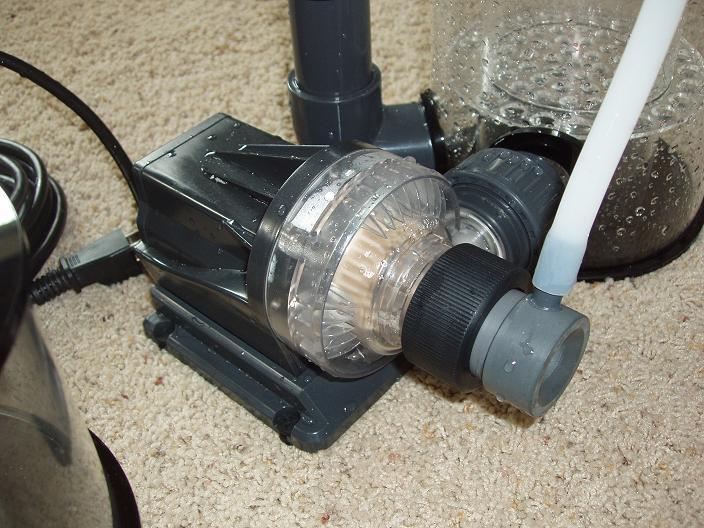
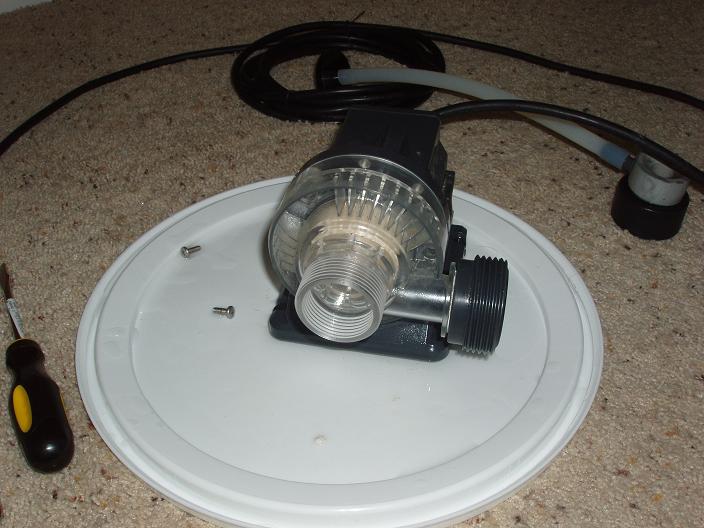
The Honya Bubble Blaster 2000 pump.
Note that the white pinwheel is actually visible through the transparent casing.
|
- The half-cone body shape, easing the transition from the main body to the collection cup.
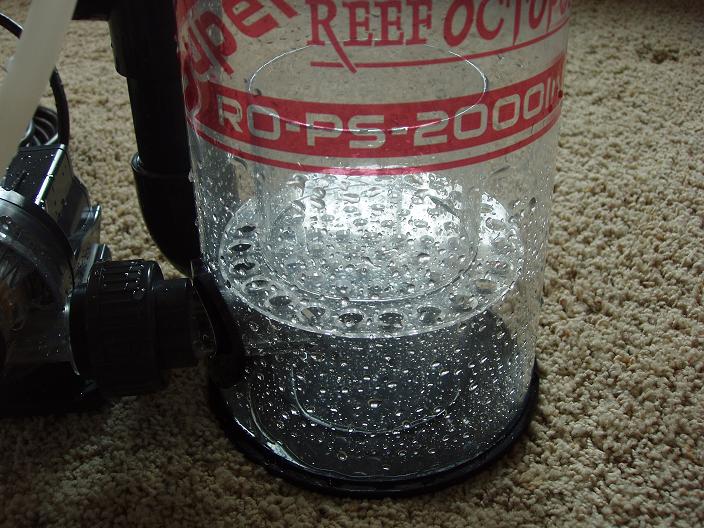
- A bubble-plate, reducing turbulence in the body.
The SRO2000's bubble plate is fixed in the body, and not removeable for cleaning.
|
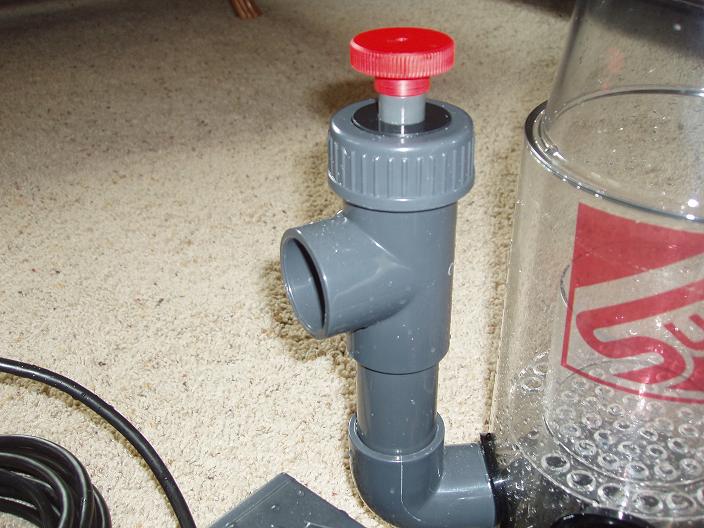
- An included gate-valve, removing the need to purchase this $20-$30 part and do a little plumbing.
The gate-valve included with the SRO2000.
|
-
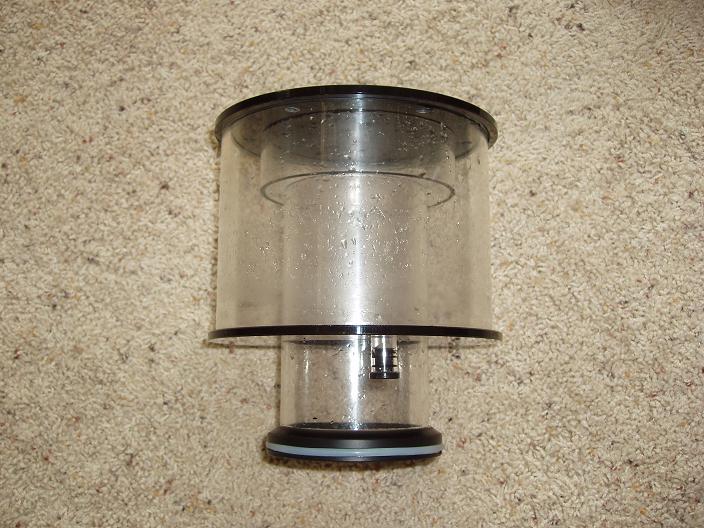
A larger, push-down collection cup that requires no twisting, pre-drilled to allow the option of having the skimmate
collect in another container.
The collection cup of the SRO2000.
|
Although most people seem to consider the push-down collection cup and improvement, I actually prefer the old twist-style. It's
a little more time-consuming, but doesn't require any pressure. However, push-down seems to be the trend these days.
I found the SRO2000 to be a considerable improvement over my old NW150. Whereas the NW150 was collecting under an inch of skimmate
a week, the SRO2000 collected about 5" in it's first week. After that it settled down to about 3" a week. The consistency of the
skimmate is equivalent between the skimmers; I adjusted the back-pressure on the SRO2000 to meet my preference for relatively thick
skimmate.
One disadvantage of the SRO2000 is the considerable noise it generates. This skimmer is the loudest component of my setup
right now, except for my chiller which only turns on intermittently. The skimmer is about as loud my two Stellar W-60 air pumps
together which I have come on only at night because of the noise they produce. Some people have suggested that the noise subsides
after a few weeks of operation, but this has not been the case for me.
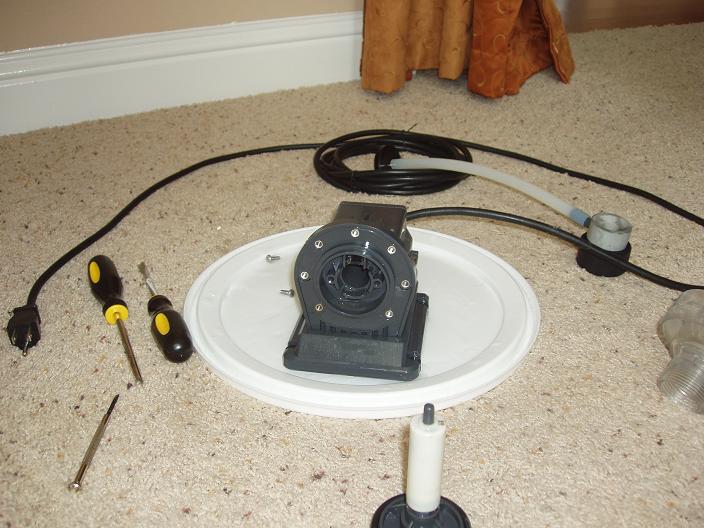
The base plate of the Honya Bubble Blaster 2000 pump.
The silicone legs are an attempt to reduce the noise that the pump produces.
|
An interesting thing about the SRO2000 skimmer is it's sensitivity to the chemistry of my tank. After feeding, the skimmer will
typically underflow for about half an hour. This is something I didn't notice with my old NW150. Adding fresh activated carbon
also seems to cause the skimmer to underflow, and doing my monthly water-change causes the skimmer to overflow. However, not so
much that the collection cup overfills immediately.
Another point to mention is the relatively low water-level this skimmer requires. Whereas the NW150 worked well in 9" of water, the
SRO2000 really works in a maximum of 6.5" of water. The water outlet pipe must be partially open to the air. With this pipe
completely submerged, the skimmer is like a volcano (even with the gate-valve all the way open); it will literally knock the
collection cup lid off. I had to raise the skimmer with an egg-crate platform to get it to work (which negated the advantage of
the skimmer's shorter height).
Despite it's sensitivity, it definately pulls out much more skimmate than my old NW150 did. And even though it does produce a lot
of noise (I have it sitting on two layers of foam filter pad as well), I haven't thought about taking it offline. It's also on
the more expensive side, at least right now. But inspite of all of these points, I am very happy with the upgrade. I would recommend
the SRO2000 over the NW150 for anyone with a system larger than a 75 gallons.
October 17, 2010
About two weeks ago, my Bubble Blaster 2000 pump suddently stopped working. It simply refused to start when plugged in and produced
little to no vibration. My first thought (given that the pump had absolutely no reaction to being plugged in) was that the problem
was an electrical issue. I contacted Vue Technologies by e-mail and they responded with an RMA number the next day. I mailed the
pump to them via regular USPS and, upon receiving it, they Fedex overnighted me a replacement.
The new pump arrived with the volute screwed in the wrong direction. Based on the pictures on the box, it looks like all Bubble
Blaster 2000 pumps not sold with a Super Reef Octopus 2000 Internal Skimmer will have their volute oriented the wrong
way.
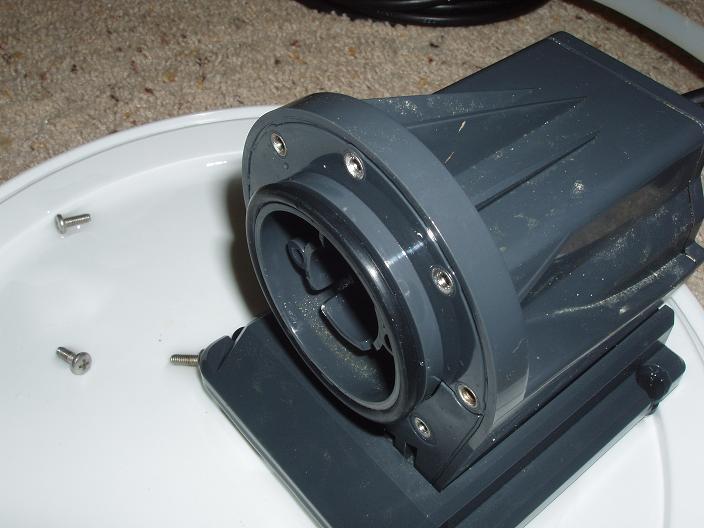
Orientation of the clear volute on the pump, just out-of-the-box.
Note that it discharges water towards the upper left.

|
However, the issue is very easy to correct. Simply unscrew the three screws holding the volute in place, rotate the volute
to the correct orientation, and then rescrew the three screws. Note that the volute orientation is not simply a left/right
issue. In the out-of-box position, the discharge is too high and the pump won't sit level with the skimmer.
Correct orientation of the volute.
|
The replacement worked very well for about week before exhibiting the exact same problem. The impeller simply wouldn't move,
even for a second, when the pump was plugged in. This time, however, I decided to look into the matter a little more closely
and I'm glad that I did. I found a very simply problem that required a very simple solution.
After unscrewing and removing the clear plastic volute, simply pull out the impeller. The magnet is quite strong, so it might
feel like the impeller doesn't come out, but it does.
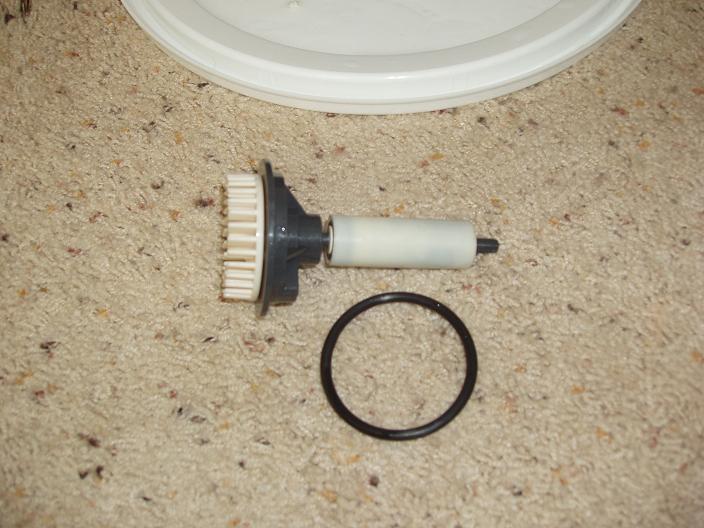
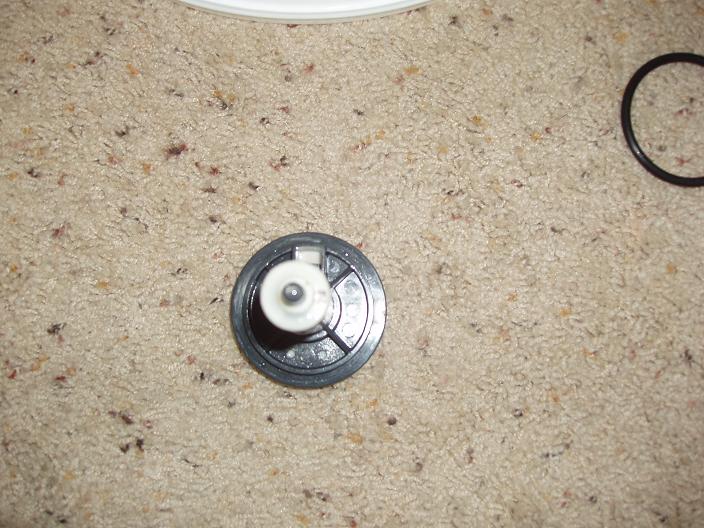
The impeller assembly of the Bubble Blaster 2000 Pump.
The pinwheel (cream) and magnet (white) rotate while the gray section locks into place on the pump body.
|
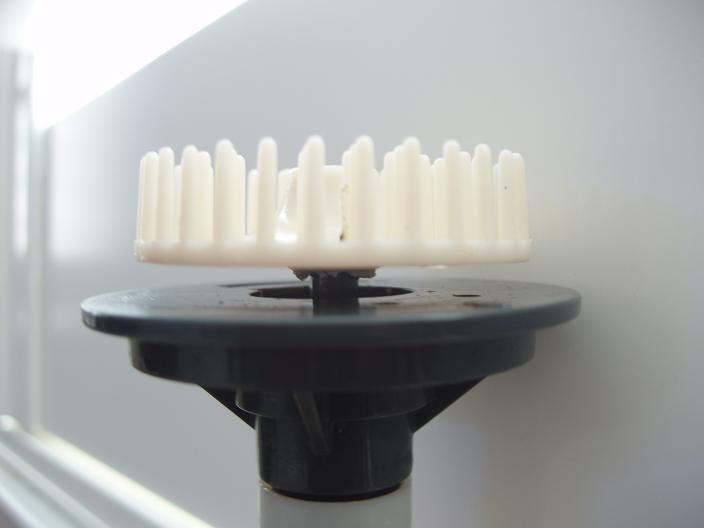
Slide the gray plastic section away from the pinwheel and check the back of the pinwheel for any "plastic mess".
A little "plastic mess" below the pinwheel.
Unfortunately, I had removed most of the extra plastic before taking this picture.
|
This extra plastic impedes the pinwheel from rotating when the gray section is pushed up right against it (as it is during
normal operation). Simply use a small flat screw driver to stab and cut away most of the extra plastic. Don't try to use
a tooth-pick here as you have actually cut through the plastic. This solved the issue for me and my pump is running just
fine now.
When placing the impeller back in, remember that the rubber O-Ring actually attaches to the body of the pump.
Don't try to attach it to the back of the gray section on the impeller.
Proper installation of the rubber O-Ring.
|
Also, make sure to align the impeller with the pump body properly. There is a square indentation on the rear of the impeller that
snaps into a similar indentation on the body of the pump.
Square indentation on the back of the gray section of the impeller.
|
Square indentation on the pump body.
You can just barely make it out here towards the top of the impeller cavity.
|
Although it took me quite some troubleshooting to figure out, this quick fix was all that was necessary to solve the problem
for me. I am still quite satisfied with the performance of both the pump and the skimmer body.
Copyright © 2010-2024 Hamza Muhammad Arain.
Except where otherwise noted, all images on this site are my own and may be used freely with visible attribution.
For more information please contact me as
"TheH" on www.reefcentral.com