July 21, 2011
Filtration:
Primary filtration was initially provided by an Octopus NeedleWheel 150 Skimmer, but I later
upgraded that to a Super Reef Octopus 2000 Internal Skimmer and observed a noticeable improvement.
When first starting the setup, I had hoped that the large refugium would allow me to use an under-sized skimmer and minimize the
disturbance to any plankton in the water column. However, cultivating and observing the benefits of said plankton turned out to be much
harder than I had initially anticipated and after eventurally removing the last of my gorgonians, I decided to go with a more
conventional approach and utilize a more appropriately-sized skimmer.
The NW150 on the left, and the SRO2000 on the right.
The SRO2000 is actually a little smaller, despite it's better performance.

|
I also started off using a Kent Marine PhosReactor to run carbon, but quickly replaced it with a Two Little Fishies PhosBan 150. I did
this because I found it cumbersome and frustrating to change out carbon in the PhosReactor, due to its poor lid design. However, I
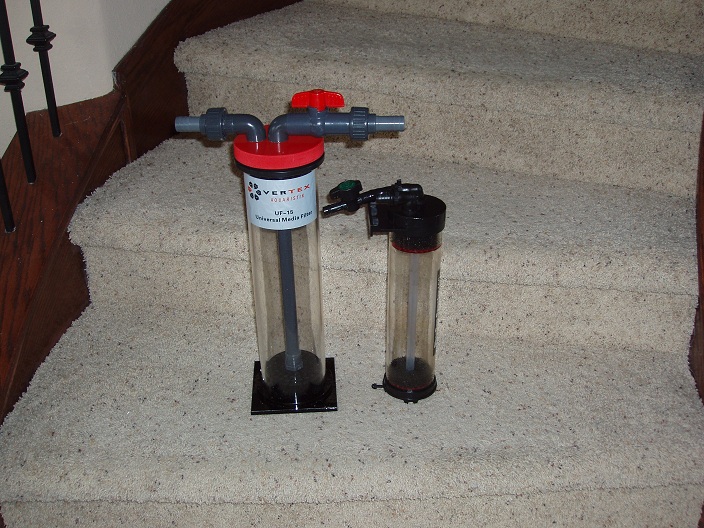
eventually upgraded to the significantly larger
Vertex UF-15 Media Reactor, which incidentally came with a much finer sponge - allowing me to
upgrade to the much smaller
ROX 0.8 carbon.
Left: Vertex UF-15, Right: Two Little Fishies PhosBan 150
|
Source Water Filtration:
I started off with a 5-Stage 100 GPD RO-DI setup from
www.MelevsReef.com. However, I eventually found this system too inefficient and slow for my
needs. It produced roughly three times as much waste-water as filtered-water. Eventually, I
modified the setup, adding a second RO filter to increase both the efficiency and speed
at which I could produce filtered water. I also added some water pressure gauges, so I could more easily tell when to replace any
filters.
Water Flow:
I started the system off with relatively weak water flow and then constantly improved it over time. Initially I had just two Hydor
Korlia #3's (at 850 GPH each) in the display and a single Hydor Koralia #2 (at 600 GPH) in the refugium. For turn-over, I had just
a single Danner Supreme Mag-5 (at 500 GPH) which, for the record, was a comparatively loud pump. By the time I shut down the system,
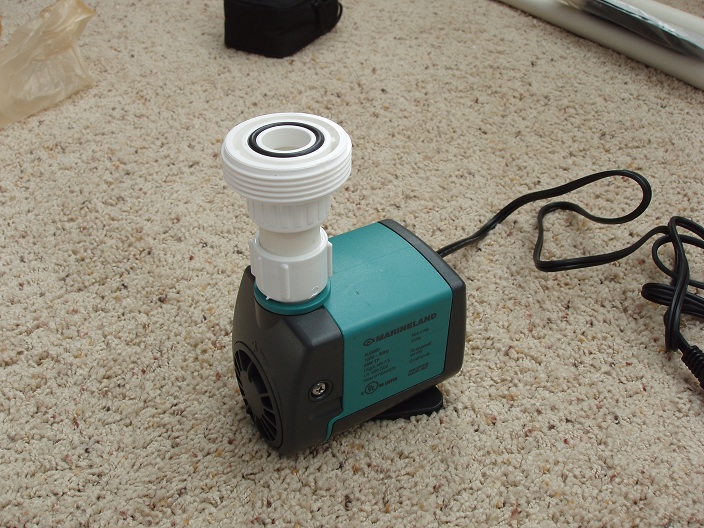
I had increased water flow to three Hydor Koralia #3's and a CoralVue High Seas 201B (at 1,500 GPH) in the display and two
Hydor Koralia #3's in the refugium. I had also decreased the noise of my setup by swapping out the Mag-5 for a Maxijet-1800 (at 450
GPH) and increased turn-over by adding a Maxijet-3000 (800 GPH) which returned water to the display tank via the chiller.
Additionally, I added a Maxijet-1200 (300 GPH) which returned water to the display tank via the media reactor.
The Maxijet-3000: Both quietier and smaller than the Mag-5.
|
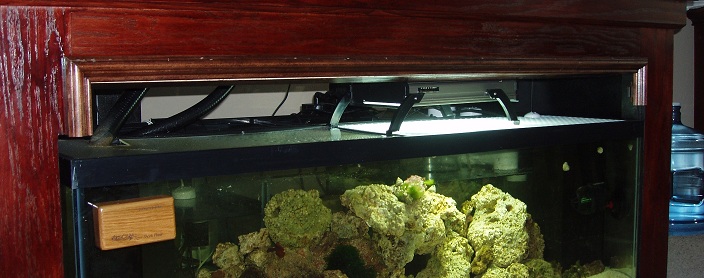
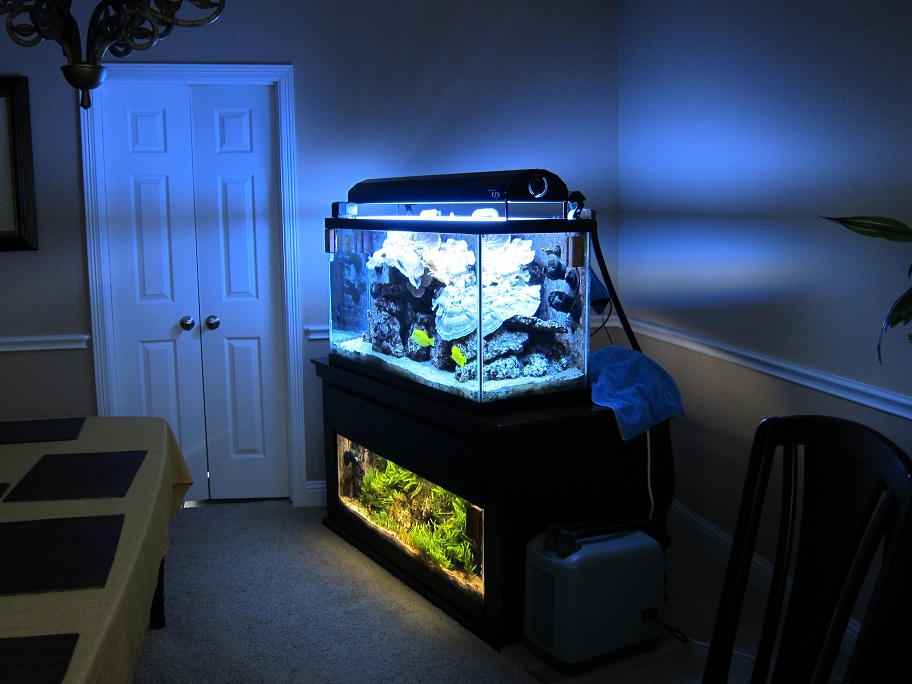
Lighting:
Lighting was another area that I started off weak with and then constantly improved on. The display tank was initially
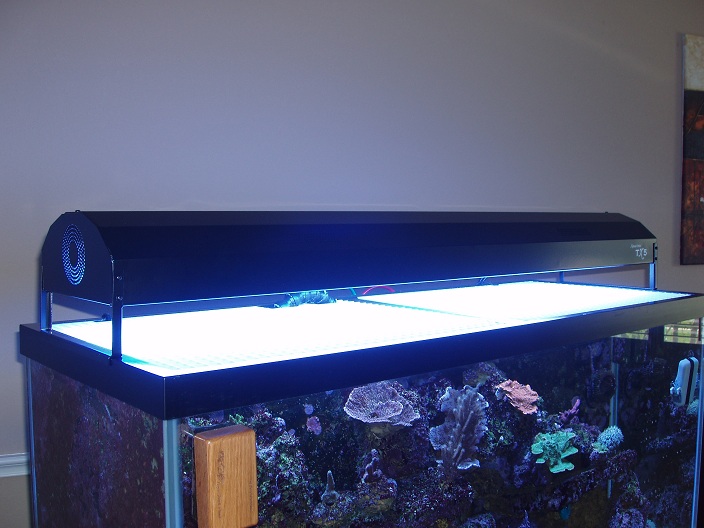
lit by a Sunlight Supply Tek 48" 4x54 watt T5 fixture, but I later upgraded that to a Aquactinics 48" 5x54 watt T5 fixture with active
cooling. The Aquactinics light was considerably brighter and the active cooling allowed the bulbs to last longer. The refugium started
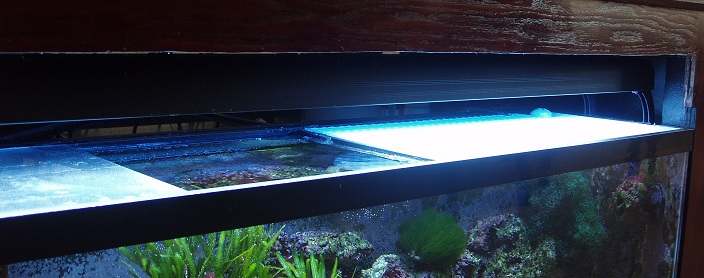
off with a Coralife Aqualight 12" 2x18 watt Power Compact fixture that would only light up a small portion of it. I later replaced that
with a Current USA Nova Extreme 24" 2x24 watt T5 fixture that would lit up about half the tank. Finally, after accidentally dropping that
fixture into the water, I settled on a Current USA Nova Extreme 48" 2x54 watt T5 fixture that lit up the entire refugium. I also decided
to use reddish bulbs (1x Giesemann Midday and 1x Giesemann Aqua Flora), to counter the bluish look of the display tank (2x Giesemann
Aqua Blue and 3x Giesemann Actinic+).
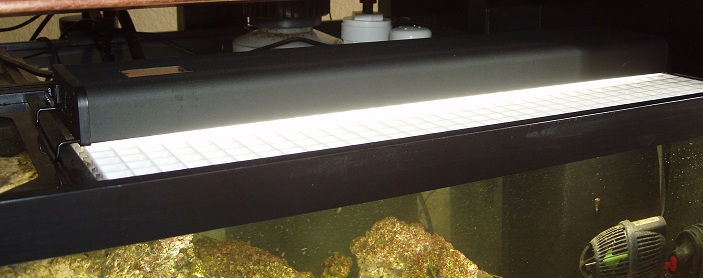
The Aquactinics TX5 5x54 Watt Light Fixture.
|
I also later added an R2 Solutions 48" LED fixture with 24 LEDs to serve as a moon-light. The fixture was much too bright and I had to
dial it down to 10% with the proprietary R2 controller I bought with it. Unfortunately this fixture came with no mounting legs, so I
had to improvise by bending and painting some metal strips to serve the purpose.
Top to bottom: incremental improvements on refugium lighting.
|
Heating & Cooling:
Temperature control was initially provided by two Ebo Jager 250 watt heaters. I had initially thought a chiller would not be necessary,
but after watching my system temperature climb to 84F in the summer months, I eventually
purchased a TECO 1/3 HP chiller with a built-in 400 watt heater. This meant I could remove my Ebo Jager
heaters. Unfortunately, I hadn't really planned for a chiller when laying out my system and the only feasable location for it proved
a little awkward.
Location of the chiller on my setup; it intermittently blew hot air towards the table.
|
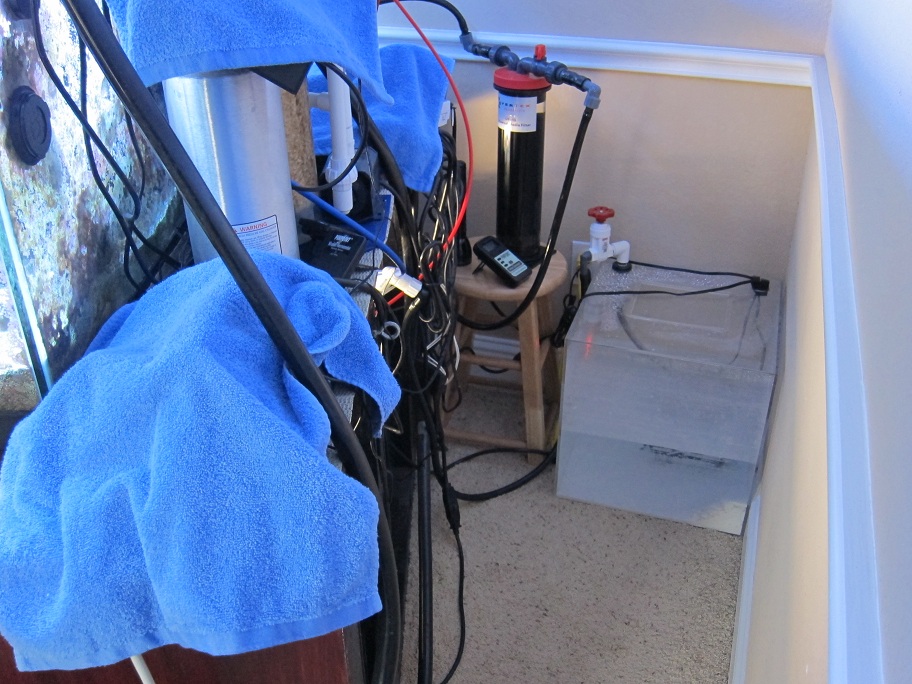
Evaporation Compensation:
Right from the start I utilized an
www.AutoTopOff.com Sump Mount Double Switch controller from a previous setup and it never
gave me any trouble. I never actually needed the second safey switch as the primary never failed. I eventually replaced the
18-gallon plastic container that I first used as a reservoir with a custom-built 18-gallon acrylic container that had almost half the
front-print. This was very important because the reservoir took up space behind my setup. I also eventually started dosing kalk
into the reservoir to help with low pH problems introduced by the calcium reactor.
Cramped area behind the setup; note the custom-built reservoir with kalk in it.
|
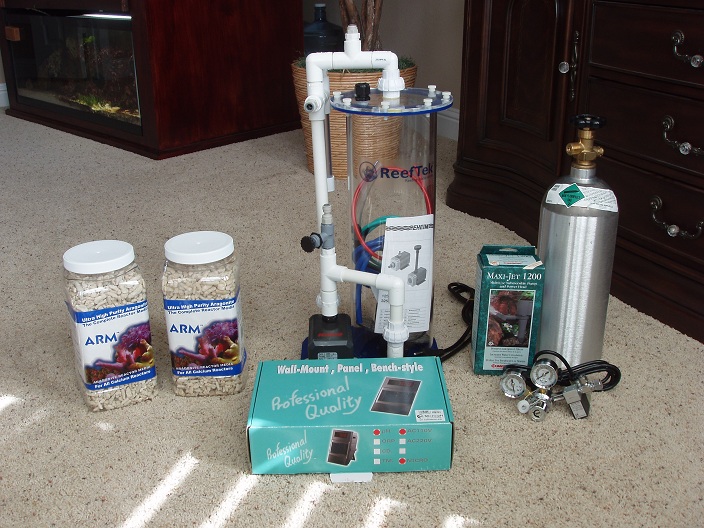
Calcium Reactor:
I purchased a Single-Chamber Calcium Reactor setup from
www.reeftek.com a couple of months into the system and had to wait even longer before I could set
it up. I purchased:
- An 18" high, ~1.5 gallon reactor with a compression fitting for an in-reactor pH probe.
- An Eheim 1250 recirculating pump and a Maxijet-1200 feed pump.
- A Reef Fanatic CO2 Regulator with Electronic Solenoid
- A Reef Fanatic Micro-pH Controller with pH Probe
- Two 5 lb. CO2 tanks
My initial calcium reactor purchase.
|
Among all of this equipment, both of the Reef Fanatic products gave me trouble. The pH Controller had an electronics failure after two
years (out of warranty), and I had to purchase another (although I did get 10% off). The CO2 regulator began failing after a few
weeks (staying in the off position), and the warranty process took so long that I purchased an
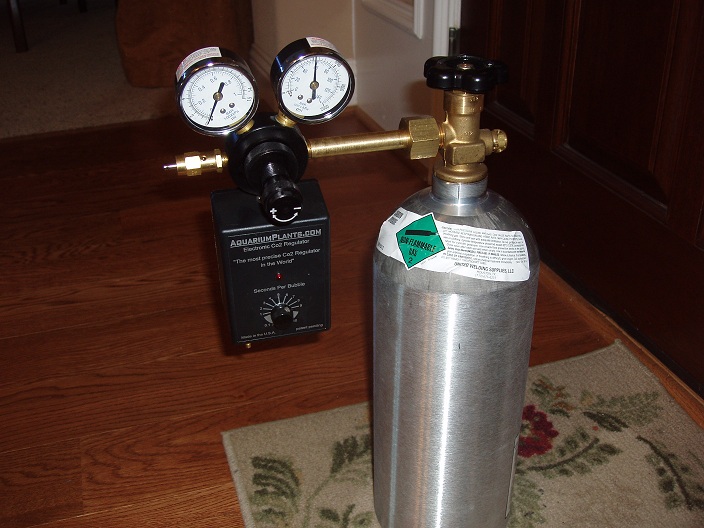
www.AquariumPlants.com Electronic CO2 Regulator in the meantime, which ultimately served me
much better. When my replacement Reef Fanatic CO2 Regulator eventually arrived, I ended up selling it.
Monitoring Equipment:
I utilized three American Marine Pinpoint monitors for the setup: a pH monitor, a salinity monitor, and a temperature monitor (with four
remote sensors). I never had any issues with these monitors. I did eventually learn to clean my pH probe in vinegar overnight before
calibrating it, whenever it needed re-calibration. When my Reef Fanatic pH Controller suffered an electronics failure, I kept it around
as a secondary pH monitor.
Copyright © 2010-2024 Hamza Muhammad Arain.
Except where otherwise noted, all images on this site are my own and may be used freely with visible attribution.
For more information please contact me as
"TheH" on www.reefcentral.com